How to Choose Basic Surgical Instruments for Your Clinic

Choosing basic surgical instruments for a clinic is not simply a purchasing task. It is a clinical decision that affects precision, safety, workflow, and staff confidence. A reliable set should match the procedures performed every week, not an imagined list of every possible case. Scalpels, tissue forceps, needle holders, scissors, retractors, and hemostats each need a clear purpose. Small details matter. A needle holder should close evenly. A hemostat should lock without excessive force. Handles should remain comfortable during repeated use.

Surgical educator Dr. Atul Gawande wrote, “The checklist gets the team to function better as a team.” That principle applies when selecting basic surgical instruments. A written instrument list can prevent duplicate purchases and missing essentials. It can also connect each item with cleaning, sterilization, inspection, and storage requirements. Choose medical-grade materials, clear manufacturer instructions, and designs that staff can inspect easily. Confirm compatibility with the clinic’s sterilization system and follow applicable healthcare standards.

Do not trust appearance alone. A polished instrument may still feel unbalanced or fail to grasp delicate tissue. Ask clinicians to test representative instruments before ordering larger quantities. This step takes time. It may prevent costly replacements later. Budget pressure can encourage compromises, but the cheapest option is not always economical. Poor alignment, difficult cleaning, or rapid corrosion can create hidden costs. Even experienced teams can overlook ergonomics during busy purchasing cycles. Review the selection after several weeks of use. What seemed suitable on paper may feel awkward in a real procedure. Good choices remain practical, traceable, and defensible.
How to Choose Basic Surgical Instruments for Your Clinic

Define the Clinical Procedures and Instrument Categories You Need

Choosing basic surgical instruments starts with clinical procedures, not catalog pages. List every procedure your clinic will perform. Note incision size, tissue depth, bleeding risk, and patient position. A minor skin excision needs different control than wound exploration. Map the procedure from preparation through closure. WHO reports that surgical site infections affect about 11% of surgical patients in low- and middle-income countries. Therefore, tissue handling and sterile processing deserve equal attention.

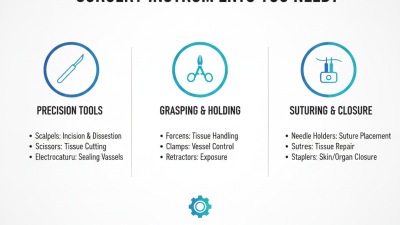
Group instruments by function: cutting, grasping, retracting, clamping, suturing, suction, and access. Select the least traumatic design that supports each task. Fine-toothed forceps may hold skin securely, while atraumatic forceps suit fragile tissue. Check working length, jaw alignment, handle comfort, and visibility under procedure lighting. CDC reports that about one in 31 hospital patients has a healthcare-associated infection on any given day. Reusable instruments must support complete cleaning, inspection, packaging, and sterilization. Confirm compatibility with AAMI ST79 guidance and your facility’s validated workflow.

Tips: Observe an actual procedure before ordering quantities. A common mistake is buying duplicates before measuring turnover and sterilization capacity. Create a small trial set first. Ask clinicians to handle instruments with gloves, then record fatigue, slipping, and visibility. I would also question familiar preferences when they increase tissue pressure. Convenience is not always clinical suitability. Review the set after several cases, because the first design will probably need revision.

How to Choose Basic Surgical Instruments for Your Clinic

Define the clinical procedures first, then select the instrument categories required for each procedure.

This chart shows representative minimum instrument quantities for a basic sterile tray used in common outpatient procedures. Wound closure and minor excision generally require the broadest mix of hemostatic, tissue-handling, cutting, suturing, and exposure instruments. Final quantities should be adjusted for local clinical protocols, procedure volume, clinician technique, and instrument reprocessing capacity.

Match Instrument Features to Surgical Tasks and Handling Requirements

Choosing basic surgical instruments starts with the task, not the catalog. A needle holder needs controlled jaws for precise suturing. Tissue forceps should match tissue delicacy and the required grip. For firm tissue, stronger teeth may help. For fragile tissue, atraumatic tips can reduce unnecessary compression. Scissors also deserve close attention. Sharp, narrow blades suit fine cutting, while heavier blades handle denser material. I have learned that “general purpose” often means compromise. Grip matters.

Handling requirements influence safety, speed, and fatigue during a procedure. A balanced instrument should sit naturally between the fingers without forcing the wrist to bend. Test the ratchet, hinge, and lock with gloved hands before selection. The mechanism should open smoothly and hold securely. A handle that feels slippery when wet can slow a critical movement. Consider shaft length, finger-ring size, and visibility around the operative field. Small hands may struggle with large rings. Large hands may lose precision with narrow handles. These details are easy to ignore. Fit is personal.

Build a practical set around common procedures, then review actual use with trained clinical staff. Record which instruments cause hand fatigue, awkward angles, or repeated adjustments. I once focused too much on material and overlooked balance; that decision needed correction. Inspect tips under bright light, and remove any instrument with misalignment or rough movement. Cleaning and sterilization instructions must fit the clinic’s validated process. Ask whether each instrument supports the exact motion required, from grasping and dissecting to clamping and suturing. A cheaper choice is not efficient if it interrupts handling or replacement cycles.

Evaluate Materials, Sterilization Compatibility, and Durability

How to Choose Basic Surgical Instruments for Your Clinic

Material choice affects handling, cleaning, and service life. Surgical-grade stainless steel is common because it resists corrosion and tolerates repeated processing. However, not every steel alloy performs equally under heat, moisture, and chemical exposure. Check the instrument’s specifications, surface finish, and joint construction before purchasing. Smooth surfaces are easier to inspect. Rough areas may trap residue.

Sterilization compatibility deserves careful attention. Confirm that each instrument is approved for your clinic’s validated steam cycle or low-temperature process. Follow the manufacturer’s instructions for temperature, exposure time, drying, and packaging. Never assume that a familiar instrument can tolerate every method. Some coatings, insulation materials, and delicate components may degrade. After processing, look for discoloration, pitting, stiffness, or water marks. Small changes matter.

Durability depends on design and maintenance, not just metal thickness. Test the grip, alignment, box lock, and ratchet during evaluation. A clamp should close evenly without excessive force. Scissors should move smoothly and meet cleanly along the blades. Keep instruments separated during cleaning to prevent scratches. I once underestimated how quickly a poorly dried joint could become stiff. That mistake changed our inspection routine. Still, visual checks are not enough; scheduled functional testing and accurate maintenance records provide stronger evidence. When uncertain, ask a qualified sterile-processing professional to review the instrument’s instructions and workflow.

Compare Safety Standards, Ergonomics, Suppliers, and Total Cost

Choosing basic surgical instruments requires more than comparing prices. Safety begins with traceable materials, smooth joints, secure locking mechanisms, and clear reprocessing instructions. ISO 17664-1:2021 specifies information manufacturers should provide for cleaning, disinfection, packaging, and sterilization. AAMI ST79 also emphasizes validated steam-sterilization practices. These details matter because the WHO Global Patient Safety Action Plan 2021–2030 estimates that one in ten patients experiences harm during healthcare, with more than half considered preventable.

Ergonomics deserves equal attention. Handles should fit gloved hands, resist slipping, and avoid excessive thumb pressure. NIOSH identifies force, repetition, and awkward wrist positions as major ergonomic risks. Ask staff to hold sample instruments for several minutes. Small discomfort becomes expensive fatigue. It is easy to overlook this during a short demonstration.

Supplier evaluation should include quality-system evidence, batch traceability, repair response times, and training support. ISO 13485 certification can indicate a structured medical-device quality system, but certification alone is not proof of practical reliability. Compare total cost over several years, including sterilization cycles, sharpening, replacement, staff time, and procedure delays. The lowest quotation may be misleading. A simple scorecard helps, although no scorecard is perfect. Reassess it after real clinical use, because purchasing assumptions often fail at the sterilization sink.

Build a Practical Starter Set and Plan Future Instrument Expansion

Choosing Basic Surgical Instruments for Your Clinic

A practical starter set should match your actual procedures, not an idealized service list. Begin with a written procedure schedule and review it with experienced surgeons and nursing staff. My first inventory plan was too optimistic. It included rarely used instruments while missing essential clamps during routine cases.

Build a core set around examination, tissue handling, cutting, grasping, suturing, and basic retraction. Include several sizes where patient anatomy may vary. Keep duplicates of frequently used instruments, especially scissors, needle holders, and hemostatic clamps. Small details matter. A missing size can delay a procedure.

Choose instruments that staff can identify quickly and clean consistently. Confirm compatibility with your sterilization process, storage space, and maintenance resources. Record each item in an inventory log, including quantity, condition, and replacement date. A simple tray map can reduce setup errors.

Plan expansion through measured demand. Review procedure records every month and note which instruments were borrowed, repeatedly unavailable, or rarely opened. Ask staff what slows preparation. Their observations may reveal weaknesses that purchase reports miss.

Avoid expanding too quickly. More instruments can create cleaning workloads, tracking problems, and unnecessary costs. Test new additions in a limited number of procedures before increasing quantities. Some choices will prove unsuitable. That is useful evidence, not failure. Reassess the set after several months, especially when services, staff, or sterilization capacity change.

How to Choose Basic Surgical Instruments for Your Clinic — Build a Practical Starter Set and Plan Future Instrument Expansion
Instrument Category Instrument Type Typical Specification Starter Quantity Primary Clinical Use Priority Expansion Trigger Estimated Unit Cost (USD)
Cutting and Dissecting Instruments
Cutting Scalpel Handle Reusable handle compatible with commonly used disposable blades 4 Holding scalpel blades for skin incision and soft-tissue work Essential Increase when several procedures are scheduled in one sterilization cycle $10–$35
Cutting Straight Operating Scissors 14–16 cm, sharp/blunt or blunt/blunt pattern 4 Cutting sutures, dressings, and superficial tissue Essential Add specialty scissors when procedure mix requires finer or heavier cutting $12–$45
Cutting Curved Dissecting Scissors 14–16 cm, blunt or sharp/blunt pattern 2 Blunt dissection and separation of soft tissue planes Recommended Add a second pair when minor soft-tissue procedures become routine $15–$55
Grasping and Holding Instruments
Grasping Toothed Tissue Forceps 12–15 cm, 1 × 2 teeth 4 Handling skin edges and other firm tissue during closure Essential Add longer versions for deeper fields or larger patients $8–$30
Grasping Non-Toothed Dressing Forceps 12–15 cm, serrated or smooth tips 4 Handling dressings, gauze, sutures, and delicate tissue Essential Add fine-tip forceps for delicate procedures or dermatologic work $8–$28
Grasping Allis Tissue Forceps 15–20 cm, multi-toothed jaws 2 Holding firm tissue when atraumatic handling is not the primary requirement Recommended Expand only if the clinic performs procedures requiring stronger tissue control $18–$65
Clamping and Hemostasis Instruments
Hemostasis Mosquito Hemostatic Forceps 12–13 cm, curved or straight, serrated jaws 6 Clamping small vessels and controlling minor bleeding Essential Increase to 8–12 when multiple bleeding points are common $12–$40
Hemostasis Kelly or Crile Hemostatic Forceps 14–16 cm, curved, partial serration 4 Clamping medium-sized vessels and tissue pedicles Essential Add longer or heavier patterns for deeper or more substantial surgical fields $15–$50
Clamping Needle Holder 14–18 cm, tungsten-carbide or standard serrated jaws 4 Holding suture needles during wound closure Essential Add a delicate or longer needle holder for specialized closure techniques $20–$90
Retracting and Exposure Instruments
Retracting Handheld Skin Retractor Single- or double-ended, approximately 15–20 cm 2 Providing gentle exposure during superficial procedures Recommended Add additional sizes when incision depth and anatomical sites vary $18–$60
Retracting Self-Retaining Retractor Small frame, approximately 6–10 cm working span 1 Maintaining exposure without continuous manual retraction Expansion Purchase after procedure volume justifies dedicated exposure equipment $35–$150
Suction, Probing, and Auxiliary Instruments
Suction Reusable Suction Cannula Small or medium diameter with compatible tubing connection 2 Removing blood and irrigation fluid from the operative field Recommended Add different tip diameters for procedures with varying fluid volume $25–$120
Probing Grooved Director or Probe Blunt-ended, approximately 14–18 cm 1 Guiding incision lines or examining superficial wounds and tracts Expansion Add when wound care, drainage, or minor surgical exploration is frequent $10–$45
Auxiliary Small Gallipot or Instrument Bowl Stainless steel, approximately 250–500 mL capacity 4 Holding irrigation solution, antiseptic solution, or small instruments Essential Add larger bowls for procedures requiring more irrigation volume $8–$35
Suturing and Wound Closure
Suturing Suture Removal Scissors Fine tip with small hook, approximately 10–13 cm 2 Removing skin sutures during postoperative follow-up Essential Keep one additional pair in each treatment or procedure room $10–$35
Suturing Adson Dressing Forceps 12 cm, serrated or non-toothed tip 2 Handling skin edges, sutures, and dressings during wound closure Essential Add toothed and non-toothed variations according to closure technique $10–$35
Instrument Processing and Safety Support
Processing Perforated Instrument Tray Stainless steel or validated sterilization-compatible material 2 Containing instruments during cleaning, packaging, and sterilization Essential Add trays when instrument turnover time limits daily procedure capacity $45–$180
Processing Instrument Protection Tip Guards Reusable or sterilization-compatible guards sized for delicate tips 1 set Protecting sharp or delicate instrument tips during processing and storage Recommended Expand the set as fine instruments and specialty tips are added $15–$60
Planning note: Begin with instruments that support the clinic’s most frequent procedures. Maintain enough duplicates to cover one complete procedure set plus instruments undergoing cleaning, packaging, or sterilization. Prices are approximate planning ranges in USD and vary by material, manufacturing quality, validation requirements, and local procurement costs.